Wednesday, May 26, 2010

Card - By The Sea

Hi, A quick post today as I am getting ready for Australia's Biggest Morning Tea. For those who don't know, this is a yearly event to raise much-needed funds for cancer research - every little bit helps.

I would like to share with you one of the first designs I did for Scrappy-Go-Lucky.


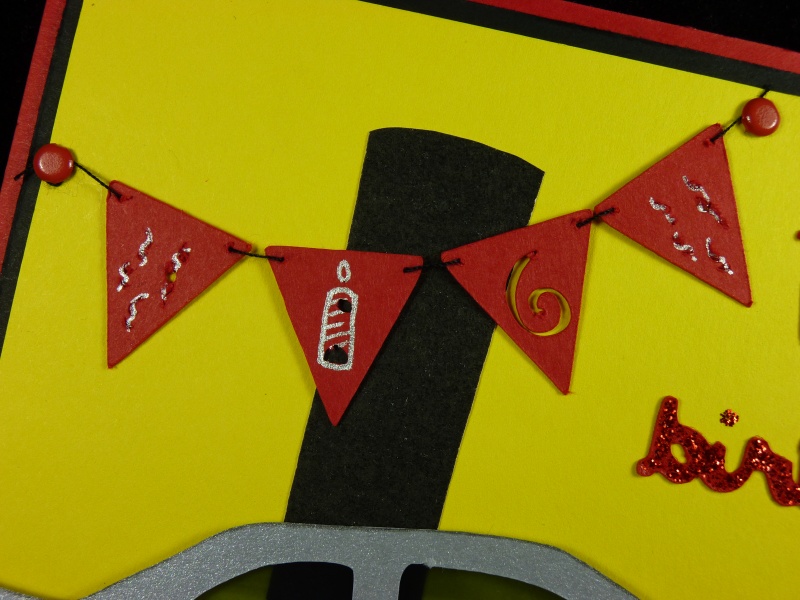
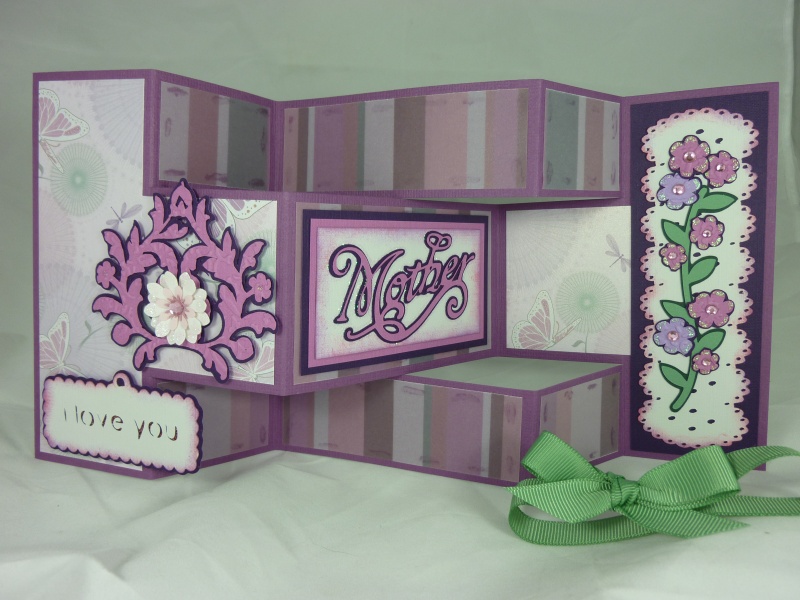
The images in this card are from the "Life's A Beach" cartridge, and I have used the lovely Alison Ellis design papers.


I had fun making these cute little sea-creatures, and they pull out to add a fun element.


Please contact me if you would like full instructions.

I would also like to thank Shelley for her gorgeous "Thank You" Card. Shelley put a lot of work into this card and it is appreciated, totally not necessary, and proudly on display in "The Pink Room". Thank you.

Till next time,
Luv, Tereesa.

Friday, May 21, 2010

L is for Lancer!

I am so proud of my son Joshua. He turned 16 yesterday, passed his Learners test, and has already saved enough and bought himself a car (Mitsubishi Lancer). I wanted his birthday card to reflect this, and after a few modifications, this is what I came up with.


This car is cut from Everyday Paper Dolls. The image is actually a Formula One car (long front), so with a bit of trimming on the front and back, it somewhat resembles a Lancer (I hope). Josh was eager to get his windows tinted, so I have used old x-rays for these windows.


This jolly "happy birthday" is from Celebrations, and highlighted with Kindyglitz.


A banner to show the world he is 16.


Joshua with his baby.


Happy Birthday Josh!!! and Congratulations on your licence.

And................

A Wheelie Good Birthday!

It is sometimes difficult to come up with ideas for males. As the theme for Josh's birthday was obviously Learners Licence and Cars, I thought a "wheel" card (to match the new rims) would be appropriate. Christopher helped me make this card for his big brother.


I used only George & Basic Shapes to cut the three circles, trimmed the edge with scissors (took forever), and used an oval punch for the design on the rim.


The card is then finished off with some brushed silver eyelets and a stamped message.

This is another card Josh received from our good friends - Tracey and her family. It was a winner for Josh - he loved it.


On another note - I would also like to say a big "Welcome to Blogland" to Shelley. As you know, Shelley has been a guest artist on this blog and I definitely recommend checking out her other creations.

Luv, Tereesa.

Monday, May 17, 2010

Card - Fisherman

Hi all, Sorry for the delay between posts but I have been suffering from the dreaded flu (as well as withdrawal symptoms from my craft room LOL). My son's birthday is in a couple of days so I had better get busy and create something for him. But, before I start that, I wanted to show you this cute little fisherman card I made for my Dad.


I used the Gypsy to duplicate him, then flip him, then I welded the two heads together at the very top. This is hidden with the hat which was added later. Unfortunately I forgot to get a photo of this, but the card opens upwards.

SU Crystal Effects was used to make the fish scales and fishing line shimmer.


Now - for those of you who were brave enough to have a guess at the number of nappies used in the Nappy Cake, Shelley has confirmed that the correct answer is...........60 !!! It's hard to believe, isn't it.

Below are two gorgeous cards that Shelley made for her two mums for Mother's Day using the Forever Young and Mother's Day cartridges.


That's it for me tonight. I'll be back soon to share the birthday cards I hope to finish tomorrow.

Take care,
Luv, Tereesa.

Wednesday, May 12, 2010

Card - Golfing Birthday

Hi, I hope you all had a wonderful Mother's Day and enjoyed being spoilt for the day. I have a few things I would like to share with you this evening. The first is a card I made for hubby's birthday. I had just received Sports Mania, so obviously had to use it. I also used the Cricut Markers for the tees in the background.


I used Love Struck to make this "manly" mailbox to match.


The golfer on the end matches the card.


As promised, here is the Mother's Day Tri-fold Card (from the Perth workshop) in the varying shades of lilac with the butterfly papers.


It's amazing how using other colours can make the same card look so different.


And lastly, I wanted to share the gorgeous Mother's Day card I received from Alyssa. I was very impressed with her colouring of the flowers, and in particular, her shading on the pots. Thank you, Alyssa.


That's it for tonight. Hope you are all having a great week and enjoying this beautiful weather before Winter sets in (although that means more indoor time for craft).

Take care,
Luv, Tereesa.

Saturday, May 8, 2010

Mother's Day Tri-Fold

Hi, This is another card using only the Mother's Day 2010 cartridge. We made this card at the workshop in Perth, along with a vase and bouquet of 12 roses (although everything was in differing shades of purple and lilac). I will post photos of these another day.


It is a tri-fold card and opens out as shown below.

For this back piece I used some light brown card for the background, then cream lace which has been inked around the edges in pale pink. Flowers and shadows were cut, finished off with glitter and rhinestones, then adhered to the vine.


I love the font in this "Mother" image.

This is a pretty little sign. I placed a piece of doublesided tape along the middle of the shadow, added pink glitter, then adhered the sign to the top allowing the glitter to show through.


This beautiful flourish on the front of the card is cut and shadowed, and finished off with a flower, rhinestone and glitter.

HAPPY MOTHER'S DAY!! to Mothers everywhere.

Luv, Tereesa.

Butterfly Spinner Card

Hi, Here is my second Mother's Day card, and it is a card - with a twist.


This pretty scallop edge is cut at 2.5cm. As the image is scalloped on both sides, it was cut in half and trimmed to fit the card. A white gel pen was used to highlight the small scallops.

"Mum" and shadow are cut at 1.5cm - make sure you have a sharp blade when cutting this small.

This gorgeous doiley is cut at 7cm. Again - a sharp blade is a must. I have also used a 1 3/8" circle punch to create the centre circle. The flower and shadow is cut a 2.5cm, and I cut a second flower in lilac, trimmed the stem and added only the flower.

Now for the twist. The centre spins.

You will need 2 x 1 1/4" circles. Place a piece of dental floss along the middle and adhere the 2 circles together. The floss is then attached to each side on the back using a strong double-sided tape. Place another piece of tape over the first and cover with a larger circle with a 1 3/8" circle punched from the middle. The images should now be attached, making sure they face the right way up as the disc spins.
The card is then finished off using some ribbon, and pretty little butterflies, and of course, glitter.

Have Fun!
Luv, Tereesa.

Thursday, May 6, 2010

Happy Mother's Day Card

Hi, Just a quick post tonight as I am suffering with the flu. As promised, here is the first of three Mother's Day Cards. This one is made with the Mother's Day 2010 cartridge, in one of my favourite colours using the Kaiser Airy Fairy papers.

This is the flower from the middle of the pin-wheel. I have cut 5 different sized flowers, glittered the edges, layered on one another, and joined with a brad.


This gorgeous flourish speaks for itself.


The "Happy Mother's Day" is cut and shadowed, and attached using foam dots to add dimension.


The card is then finished off with some ribbons and pearls, for that elegant touch that all Mums love.

The designs in this cartridge are so beautiful, it doesn't need much to make them work.

Till tomorrow,
Luv, Tereesa.


Wednesday, May 5, 2010

Wonderful Weekend in Perth

Hi Everyone, Alyssa and I had a fantastic time in Perth this last weekend. It was truly wonderful getting to know Mandy, Chris and Sophie, and we somehow managed some time to take in the sights.

Here we are at Kings Park overlooking the city of Perth.


One of the many War Memorials at Kings Park.


This is the hallway leading to the bathrooms in a restaurant in Freemantle. I absolutely loved all the old stone buildings in this city. Mandy is a very knowledgeable tour guide.


We also had the opportunity to spend an evening with the ever-talented Jane. Unfortunately, I forgot to take my camera along, but it was a wonderful evening and a pleasure to meet her.

Here we are (Mandy and myself) working hard at the workshop. (We were - really).


Mandy with her assistant, Alyssa (who did a wonderful job on the day).


With some of the wonderful ladies I met.


And of course, Linda. Linda and I have been email buddies for about 8 months, so it was great to finally meet.


I would like to personally thank Mandy, Chris and Sophie for their hospitality and for making us feel so welcome. It was definitely a weekend to remember.

Tomorrow I will show some of the Mother's Day Cards I have been working on.

Luv, Tereesa & Alyssa.