Hi, I hope you all had a wonderful Mother's Day and enjoyed being spoilt for the day. I have a few things I would like to share with you this evening. The first is a card I made for hubby's birthday. I had just received Sports Mania, so obviously had to use it. I also used the Cricut Markers for the tees in the background.
I used Love Struck to make this "manly" mailbox to match.
The golfer on the end matches the card.
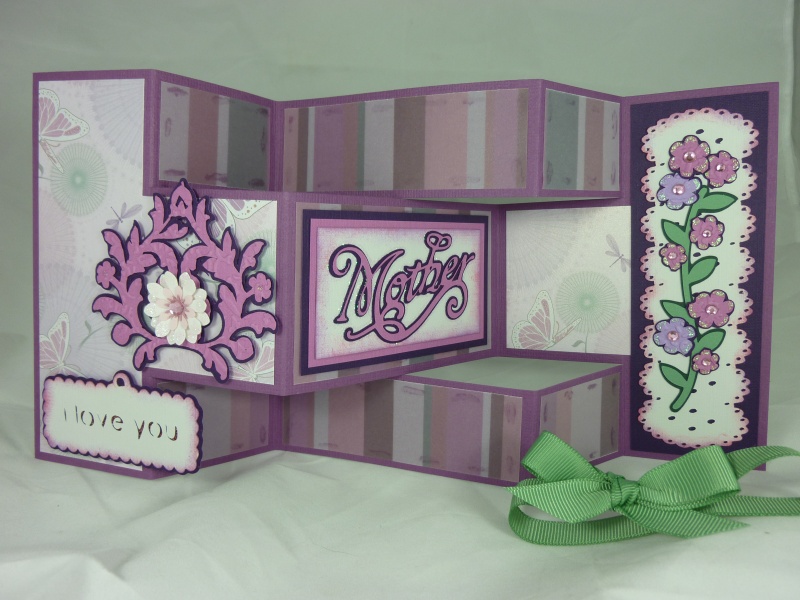
As promised, here is the Mother's Day Tri-fold Card (from the Perth workshop) in the varying shades of lilac with the butterfly papers.
It's amazing how using other colours can make the same card look so different.
And lastly, I wanted to share the gorgeous Mother's Day card I received from Alyssa. I was very impressed with her colouring of the flowers, and in particular, her shading on the pots. Thank you, Alyssa.
That's it for tonight. Hope you are all having a great week and enjoying this beautiful weather before Winter sets in (although that means more indoor time for craft).
Take care,
Luv, Tereesa.
Showing posts with label Mother's Day 2010. Show all posts
Wednesday, May 12, 2010
Saturday, May 8, 2010
Mother's Day Tri-Fold
Hi, This is another card using only the Mother's Day 2010 cartridge. We made this card at the workshop in Perth, along with a vase and bouquet of 12 roses (although everything was in differing shades of purple and lilac). I will post photos of these another day.
It is a tri-fold card and opens out as shown below.
For this back piece I used some light brown card for the background, then cream lace which has been inked around the edges in pale pink. Flowers and shadows were cut, finished off with glitter and rhinestones, then adhered to the vine.
I love the font in this "Mother" image.
This is a pretty little sign. I placed a piece of doublesided tape along the middle of the shadow, added pink glitter, then adhered the sign to the top allowing the glitter to show through.
This beautiful flourish on the front of the card is cut and shadowed, and finished off with a flower, rhinestone and glitter.
HAPPY MOTHER'S DAY!! to Mothers everywhere.
Luv, Tereesa.
It is a tri-fold card and opens out as shown below.
For this back piece I used some light brown card for the background, then cream lace which has been inked around the edges in pale pink. Flowers and shadows were cut, finished off with glitter and rhinestones, then adhered to the vine.
I love the font in this "Mother" image.
This is a pretty little sign. I placed a piece of doublesided tape along the middle of the shadow, added pink glitter, then adhered the sign to the top allowing the glitter to show through.
This beautiful flourish on the front of the card is cut and shadowed, and finished off with a flower, rhinestone and glitter.
HAPPY MOTHER'S DAY!! to Mothers everywhere.
Luv, Tereesa.
Butterfly Spinner Card
Hi, Here is my second Mother's Day card, and it is a card - with a twist.
This pretty scallop edge is cut at 2.5cm. As the image is scalloped on both sides, it was cut in half and trimmed to fit the card. A white gel pen was used to highlight the small scallops.
"Mum" and shadow are cut at 1.5cm - make sure you have a sharp blade when cutting this small.
This gorgeous doiley is cut at 7cm. Again - a sharp blade is a must. I have also used a 1 3/8" circle punch to create the centre circle. The flower and shadow is cut a 2.5cm, and I cut a second flower in lilac, trimmed the stem and added only the flower.
Now for the twist. The centre spins.
You will need 2 x 1 1/4" circles. Place a piece of dental floss along the middle and adhere the 2 circles together. The floss is then attached to each side on the back using a strong double-sided tape. Place another piece of tape over the first and cover with a larger circle with a 1 3/8" circle punched from the middle. The images should now be attached, making sure they face the right way up as the disc spins.
The card is then finished off using some ribbon, and pretty little butterflies, and of course, glitter.
Have Fun!
Luv, Tereesa.
This pretty scallop edge is cut at 2.5cm. As the image is scalloped on both sides, it was cut in half and trimmed to fit the card. A white gel pen was used to highlight the small scallops.
"Mum" and shadow are cut at 1.5cm - make sure you have a sharp blade when cutting this small.
This gorgeous doiley is cut at 7cm. Again - a sharp blade is a must. I have also used a 1 3/8" circle punch to create the centre circle. The flower and shadow is cut a 2.5cm, and I cut a second flower in lilac, trimmed the stem and added only the flower.
Now for the twist. The centre spins.
You will need 2 x 1 1/4" circles. Place a piece of dental floss along the middle and adhere the 2 circles together. The floss is then attached to each side on the back using a strong double-sided tape. Place another piece of tape over the first and cover with a larger circle with a 1 3/8" circle punched from the middle. The images should now be attached, making sure they face the right way up as the disc spins.
The card is then finished off using some ribbon, and pretty little butterflies, and of course, glitter.
Have Fun!
Luv, Tereesa.
Thursday, May 6, 2010
Happy Mother's Day Card
Hi, Just a quick post tonight as I am suffering with the flu. As promised, here is the first of three Mother's Day Cards. This one is made with the Mother's Day 2010 cartridge, in one of my favourite colours using the Kaiser Airy Fairy papers.
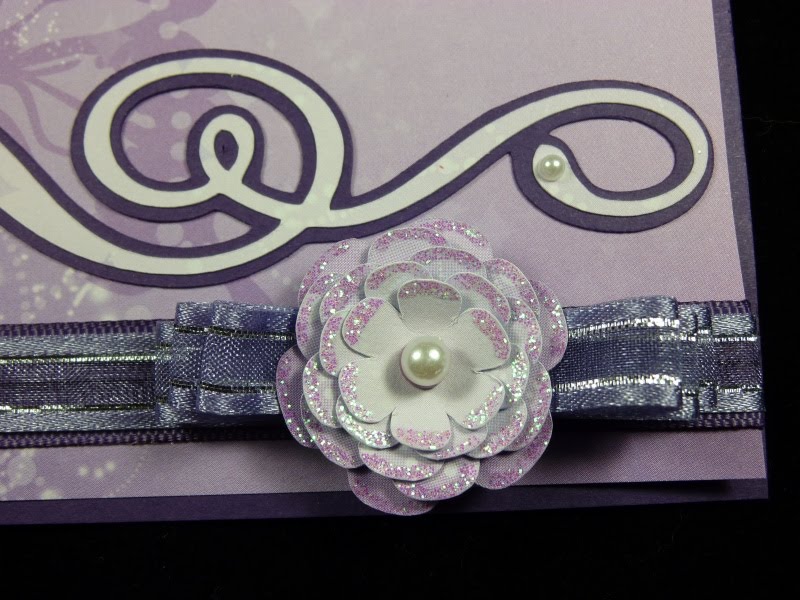
This is the flower from the middle of the pin-wheel. I have cut 5 different sized flowers, glittered the edges, layered on one another, and joined with a brad.
This gorgeous flourish speaks for itself.
The "Happy Mother's Day" is cut and shadowed, and attached using foam dots to add dimension.
The card is then finished off with some ribbons and pearls, for that elegant touch that all Mums love.
The designs in this cartridge are so beautiful, it doesn't need much to make them work.
Till tomorrow,
Luv, Tereesa.
This is the flower from the middle of the pin-wheel. I have cut 5 different sized flowers, glittered the edges, layered on one another, and joined with a brad.
This gorgeous flourish speaks for itself.
The "Happy Mother's Day" is cut and shadowed, and attached using foam dots to add dimension.
The card is then finished off with some ribbons and pearls, for that elegant touch that all Mums love.
The designs in this cartridge are so beautiful, it doesn't need much to make them work.
Till tomorrow,
Luv, Tereesa.
Subscribe to:
Posts (Atom)