Hi, This is one of my favourite cards, and was featured recently at Scrappy-Go-Lucky. It makes me think of days gone by – a time when men were gentlemen – a time of elegance.
The dress is coloured using watercolour crayons, and the man’s suit is heat embossed in black. The stamp is from Graphic 45.
For the background, I embossed the Core’dinations Whitewash with cuttlebug folder Jamara, then sanded the top layer to reveal the pattern. This is very effective, and can be achieved particularly well with the Whitewash collection. The lace is cut from Martha Stewart Elegant Cake Art.
The cream doiley in the background is from Paper Lace.
These flowers are from Stretch Your Imagination sized at 1 1/4″, 1 1/2″, and 1 3/4″. They’ve been coated in black glitter, layered, and a pearl added to the centre.
This card was for the Printblocks Creative Block in May, and only certain products could be used. I’m really happy with the end result. Hope you like it too.
And to whet your appetite a little more, here's a sneak peak of a super cute card being featured at Scrappy-Go-Lucky today. If you get a chance, head on over to check it out.
Till next time,
Luv Tereesa.
Showing posts with label Scrappy-Go-Lucky. Show all posts
Wednesday, July 13, 2011
Wednesday, July 6, 2011
Frosty Cupcakes!!
Hi Everyone, Sorry my blog posts have been a bit sporadic lately, but things finally seem to settling into a routine now, so I hope to be again posting regularly.
I made this birthday card for a very special friend, Shelley (whose favourite colour is also pink). I was having fun experimenting with the new Imagine cartridges, and for this card I chose to use "Imagine Yummy” - check out the gorgeous colours and swirls of the images on this card.
I have used only the Core-dinations white cardstock for all the images below. This card prints and cuts beautifully with the Imagine. Isn’t the “happy birthday” paper gorgeous?
I’d also like to show you this really cool technique I heard about last year with SU. To achieve a look of real frosting on the cupcake, simply cover the area with Tombow multi liquid glue, leaving uneven swirls as you go.

Liberally cover the glue with embossing powder. You could use any colour, eg brown for chocolate frosting, but because my image was already pink, I used clear powder with some glitter mixed in.

You then heat emboss until it bubbles up, let the bubbles settle, and heat again. You may need to repeat this a few times until all the glue has dried.
Real frosting…. What do you think?
I added my two layers to the base image using foam dots to add extra dimension.
These flourishes and gifts were all cut at 1″ – and glittered accordingly.
And the sentiment was also cut at 1″, base image only, with a little bling added.
I hope you have found this useful – and enjoy making some yummy frosting.
And now that I've whet your appetite, Mandy at Scrappy-Go-Lucky has 30% off all Imagine cartridges for 2 days only. Don't miss out.
The Scrappy-Go-Lucky Blog is now up and running again. Here is a sneak peak at what I have featured there tomorrow. Make sure you check it out.
Thanks for stopping by.
Till next time, Luv Tereesa.
I made this birthday card for a very special friend, Shelley (whose favourite colour is also pink). I was having fun experimenting with the new Imagine cartridges, and for this card I chose to use "Imagine Yummy” - check out the gorgeous colours and swirls of the images on this card.
I have used only the Core-dinations white cardstock for all the images below. This card prints and cuts beautifully with the Imagine. Isn’t the “happy birthday” paper gorgeous?
I’d also like to show you this really cool technique I heard about last year with SU. To achieve a look of real frosting on the cupcake, simply cover the area with Tombow multi liquid glue, leaving uneven swirls as you go.

Liberally cover the glue with embossing powder. You could use any colour, eg brown for chocolate frosting, but because my image was already pink, I used clear powder with some glitter mixed in.

You then heat emboss until it bubbles up, let the bubbles settle, and heat again. You may need to repeat this a few times until all the glue has dried.
Real frosting…. What do you think?
I added my two layers to the base image using foam dots to add extra dimension.
These flourishes and gifts were all cut at 1″ – and glittered accordingly.
And the sentiment was also cut at 1″, base image only, with a little bling added.
I hope you have found this useful – and enjoy making some yummy frosting.
And now that I've whet your appetite, Mandy at Scrappy-Go-Lucky has 30% off all Imagine cartridges for 2 days only. Don't miss out.
The Scrappy-Go-Lucky Blog is now up and running again. Here is a sneak peak at what I have featured there tomorrow. Make sure you check it out.
Thanks for stopping by.
Till next time, Luv Tereesa.
Themes
Birthday,
Imagine,
Imagine Yummy,
Scrappy-Go-Lucky,
Sneak Peak,
Techniques
Thursday, May 26, 2011
Sneak Peak
Hi, Here's a quick sneak peak of a card being featured at Scrappy-Go-Lucky today - I've used Copics markers together with some Cricut cuts to make a dimensional frame.
Be sure to check it out ..... I hope you like it!
Till next time,
Luv, Tereesa
Be sure to check it out ..... I hope you like it!
Till next time,
Luv, Tereesa
Wednesday, April 6, 2011
"April Flowers" Blooms
Hi, A few days ago, Scrappy-Go-Lucky's awesome "April Flowers Competition" was announced - win your very own CRICUT IMAGINE. Today's "Two Up Tuesday" on Scrappy-Go-Lucky features some flowers Alyssa and I created for Mandy.
These are Alyssa's - I think they resemble some type of bottlebrush flower.
She worked on these all afternoon, colouring each flower centre with a Lemon Spica pen and then glueing them on.
Here's a photo of the leftover cardstock - she's going to use it as backgrounds for some cards.
These are my blooms - I loved using the colour combo of brown, green and turquoise.
Pipe cleaners, wire, and florist tape was used for the branches.
Apart from the pinecones, everything is cut from the Mother's Day Bouquet cartridge. I used Puffy Velvet pens on the petal edges and the stamens - and loved the end result.
I found the cut for the pine-cones on Gypsy Font - and of course, had to add some glitter somewhere.
This is my Baby's Breath - I "borrowed" some of Alyssa's leftover flowers.
I hope these have inspired you. For more photos, and all entry details for the "April Flowers Competition", head over to Scrappy-Go-Lucky.
Till next time,
Luv, Tereesa & Alyssa.
These are Alyssa's - I think they resemble some type of bottlebrush flower.
She worked on these all afternoon, colouring each flower centre with a Lemon Spica pen and then glueing them on.
Here's a photo of the leftover cardstock - she's going to use it as backgrounds for some cards.
These are my blooms - I loved using the colour combo of brown, green and turquoise.
Pipe cleaners, wire, and florist tape was used for the branches.
Apart from the pinecones, everything is cut from the Mother's Day Bouquet cartridge. I used Puffy Velvet pens on the petal edges and the stamens - and loved the end result.
I found the cut for the pine-cones on Gypsy Font - and of course, had to add some glitter somewhere.
This is my Baby's Breath - I "borrowed" some of Alyssa's leftover flowers.
I hope these have inspired you. For more photos, and all entry details for the "April Flowers Competition", head over to Scrappy-Go-Lucky.
Till next time,
Luv, Tereesa & Alyssa.
Sunday, April 3, 2011
Win an "Imagine" Machine with SGL
Hi Everyone - Have you all checked out Scrappy-Go-Lucky's awesome competition yet? The prize is a brand new Imagine machine! You can get all of the details and the rules on the Scrappy-Go-Lucky blog HERE.
Basically, the competition involves creating an everlasting bloom with the Cricut, using the Scrappy-Go-Lucky colors of turquoise, green and brown. Send it to Mandy so she can replace the live flowers in this lovely birdcage and hang it in the new workshop. There are so many possibilities~
And - wait for it - Scrappy-Go-Lucky has another great opportunity for you. When you buy any of the following 3 items during the month of April you will have a chance to win the entire purchasing price as a cash refund!
Be sure to check out all the details HERE!!
Till next time,
Luv, Tereesa.
Basically, the competition involves creating an everlasting bloom with the Cricut, using the Scrappy-Go-Lucky colors of turquoise, green and brown. Send it to Mandy so she can replace the live flowers in this lovely birdcage and hang it in the new workshop. There are so many possibilities~
And - wait for it - Scrappy-Go-Lucky has another great opportunity for you. When you buy any of the following 3 items during the month of April you will have a chance to win the entire purchasing price as a cash refund!
Be sure to check out all the details HERE!!
Till next time,
Luv, Tereesa.
Thursday, March 31, 2011
Engagement Card!
Hi, This is the card featured today on Scrappy-Go-Lucky. I fell in love with these gorgeous lovebirds from the Imagine "Better Together" cartridge; and when Shelley’s daughter, Jessie, recently became engaged, I thought they would be perfect.
The background is from the "Paper Lace" cartridge, and I've added ribbons, pearls, and a crocheted doiley.
I love the way you can layer different aspects of images with the Imagine cuts.
The sentiment and shadow is from "MS Elegant Cake Art", and I’ve used white glitter over the complete word. Don’t forget you can win this cartridge this week by adding a comment to any or all of the posts on Scrappy-Go-Lucky from Sunday 27th March until Saturday 2nd April.
For all sizes and instructions for this card, head over to Scrappy-Go-Lucky.
Now for some big news - would you like the chance to win your very own Imagine Machine. Mandy from Scrappy-Go-Lucky is having an amazing give-away - details will be revealed tomorrow...
Here's a sneak peak!
Luv, Tereesa.
The background is from the "Paper Lace" cartridge, and I've added ribbons, pearls, and a crocheted doiley.
I love the way you can layer different aspects of images with the Imagine cuts.
The sentiment and shadow is from "MS Elegant Cake Art", and I’ve used white glitter over the complete word. Don’t forget you can win this cartridge this week by adding a comment to any or all of the posts on Scrappy-Go-Lucky from Sunday 27th March until Saturday 2nd April.
For all sizes and instructions for this card, head over to Scrappy-Go-Lucky.
Now for some big news - would you like the chance to win your very own Imagine Machine. Mandy from Scrappy-Go-Lucky is having an amazing give-away - details will be revealed tomorrow...
Here's a sneak peak!
Luv, Tereesa.
Monday, March 21, 2011
Anniversary Card
Hi, Last month was our Anniversary, and this is the card I made for hubby using the new Imagine. It was featured last week at Scrappy-Go-Lucky.
Apart from the base card, everything was printed and cut from Core-dinations white cardstock. This is great cardstock to work with - it cuts beautifully on the Cricut, and it is textured on one side and smooth on the other. Either side can be used depending on the look you are after.
I cut the base image of the ice-cream sundae (from the "Imagine Yummy" cartridge), and then recut only the ice-cream layers. The ice-cream ends up being 4 layers.
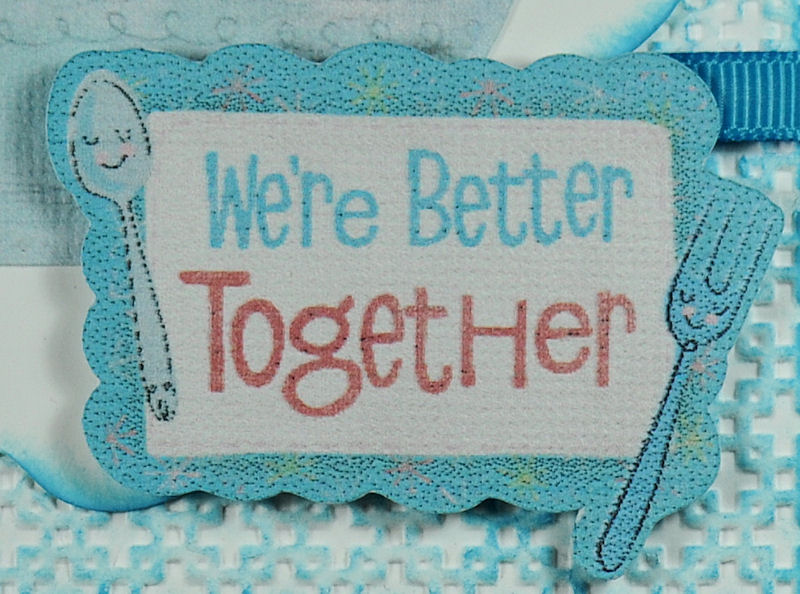
This cute sentiment is from the "Imagine Better Together" cartridge, and I thought it was very appropriate for the occasion.
The fork and spoon are two of the layers from the above sentiment. I cut them separately, and added glossy accents.
For all the details to make this card, and some tips for the Imagine, head over to Scrappy-Go-Lucky.
Till next time,
Luv, Tereesa.
Apart from the base card, everything was printed and cut from Core-dinations white cardstock. This is great cardstock to work with - it cuts beautifully on the Cricut, and it is textured on one side and smooth on the other. Either side can be used depending on the look you are after.
I cut the base image of the ice-cream sundae (from the "Imagine Yummy" cartridge), and then recut only the ice-cream layers. The ice-cream ends up being 4 layers.
This cute sentiment is from the "Imagine Better Together" cartridge, and I thought it was very appropriate for the occasion.
The fork and spoon are two of the layers from the above sentiment. I cut them separately, and added glossy accents.
For all the details to make this card, and some tips for the Imagine, head over to Scrappy-Go-Lucky.
Till next time,
Luv, Tereesa.
Monday, March 14, 2011
Mandy's Birthday
Hi Friends, Mandy celebrated her birthday last week, so today I thought I'd show you the card I made for her; which was recently featured at Scrappy-Go-Lucky. I’ve really enjoyed exploring the different posssibilities with the Imagine and decided that I wanted to use flowers from the Mother’s Day Bouquet cartridge combined with the gorgeous paper patterns from the Imagine cartridges. 90% of this card is made with Core-dinations White cardstock - the colours and patterns were added with the Imagine.
Some of the beautiful flowers from the "Mother's Day Bouquet" cartridge.
I love all the different shapes.
And this gorgeous birdcage is from "Serenade".
A beautiful background doiley.
Clear embossing was used to alter the look of this plain cardstock.
Here is the completed easel card.
For more photos and full instructions, along with some tips for getting the most out of your Imagine, head over to Scrappy-Go-Lucky.
We also had a birthday to celebrate on the weekend - Alyssa turned 11. All she wanted was to eat out at a restaurant, so it was a celebration to be able to get her out and about for a few hours. Check back tomorrow for some photos of her special day.
Take care,
Luv, Tereesa.
Some of the beautiful flowers from the "Mother's Day Bouquet" cartridge.
I love all the different shapes.
And this gorgeous birdcage is from "Serenade".
A beautiful background doiley.
Clear embossing was used to alter the look of this plain cardstock.
Here is the completed easel card.
For more photos and full instructions, along with some tips for getting the most out of your Imagine, head over to Scrappy-Go-Lucky.
We also had a birthday to celebrate on the weekend - Alyssa turned 11. All she wanted was to eat out at a restaurant, so it was a celebration to be able to get her out and about for a few hours. Check back tomorrow for some photos of her special day.
Take care,
Luv, Tereesa.
Wednesday, March 9, 2011
Watch Gift Box
Hi, I'm finding small amounts of time here and there to get back into "The Pink Room". We have a lot of birthdays happening this time of the year, so I think sometimes necessity is a really good thing.
Alyssa and I have been having so much fun discovering the 'ins and outs' of the Cricut Imagine (an enormous birthday surprise from Mandy - thank you so so much!!!) I made this cute little gift bag for hubby which was featured on Scrappy-Go-Lucky last week.
This sentiment was printed and cut on the Imagine. I could have printed it as one layer, but decided to do two to add some extra dimension.
The watch was cut from 'My Community'. The clock face is on page 9, and the watch straps are actually 2 of the crayons from page 13. The clock face was covered in glossy accents to give a shiny finish and a brad was used to attach the watch hands so they could spin. The wrist straps were embossed using Animal Prints cuttlebug folder, and then some darker ink was added using a dauber.
For full instructions, please check out the Scrappy-Go-Lucky blog.
Till next time,
With luv, Tereesa.
Alyssa and I have been having so much fun discovering the 'ins and outs' of the Cricut Imagine (an enormous birthday surprise from Mandy - thank you so so much!!!) I made this cute little gift bag for hubby which was featured on Scrappy-Go-Lucky last week.
This sentiment was printed and cut on the Imagine. I could have printed it as one layer, but decided to do two to add some extra dimension.
The watch was cut from 'My Community'. The clock face is on page 9, and the watch straps are actually 2 of the crayons from page 13. The clock face was covered in glossy accents to give a shiny finish and a brad was used to attach the watch hands so they could spin. The wrist straps were embossed using Animal Prints cuttlebug folder, and then some darker ink was added using a dauber.
For full instructions, please check out the Scrappy-Go-Lucky blog.
Till next time,
With luv, Tereesa.
Themes
Imagine,
Imagine More,
My Community,
OTP,
Scrappy-Go-Lucky,
Wrap It Up
Wednesday, November 3, 2010
Whip It Up Wednesday's Copics Rose !!
Hi, Today is the first of Scrappy-Go-Lucky's new fortnightly challenge - "Whip It Up Wednesday". For each challenge, held on the first and third Wednesday of each month, you will need to Whip Something Up to meet the criteria of the challenge.
The first challenge: Use colouring in some way to enhance your cricut cuts. Click HERE for all the details.
I enjoy using all the "toys" in my craft room, and try to use a number of them together on projects. Therefore, incorporating my Copics with my Cricut was fun. I decided to try a card using just the base or shadow cut of an image, then colouring with Copics to see what effects could be achieved. This is what I came up with.
This beautiful flower is from "Rock Princess". As you can see below, I cut only the base image (sized at 3 1/2"). I've left the guide cuts to serve as reference points when colouring.
Below is the first layer of colouring. I've used R32 to colour the flower area first.
I've then used R35 / R37 / R59 to bring depth of colour and dimension into the flower. The blender pen is a must-have when using Copics. It literally pushes the ink away. I've used it here to create the dots in the centre to represent the stamens. The leaves are coloured using G17 / G28.
Shimmer paint has been swiped very lightly over the flower, with sections then highlighted with Glaze pens and glitter. I also added a couple of extra leaves around the edge.
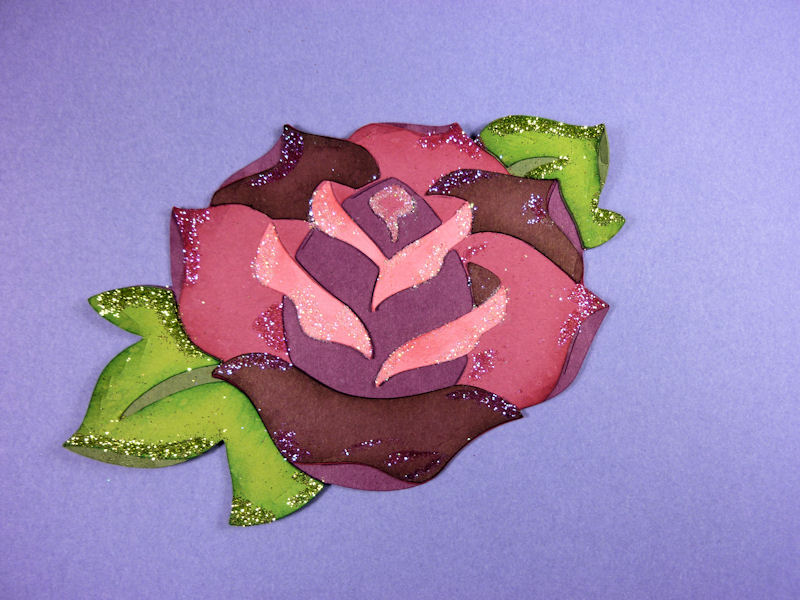
Below is the same rose put together with the different layers as normal. I've inked around the edges and added some glitter.
Congratulations to all the winners of the Scrappy-Go-Lucky Blog Hop.
Till next time,
Luv, Tereesa.
The first challenge: Use colouring in some way to enhance your cricut cuts. Click HERE for all the details.
I enjoy using all the "toys" in my craft room, and try to use a number of them together on projects. Therefore, incorporating my Copics with my Cricut was fun. I decided to try a card using just the base or shadow cut of an image, then colouring with Copics to see what effects could be achieved. This is what I came up with.
This beautiful flower is from "Rock Princess". As you can see below, I cut only the base image (sized at 3 1/2"). I've left the guide cuts to serve as reference points when colouring.
Below is the first layer of colouring. I've used R32 to colour the flower area first.
I've then used R35 / R37 / R59 to bring depth of colour and dimension into the flower. The blender pen is a must-have when using Copics. It literally pushes the ink away. I've used it here to create the dots in the centre to represent the stamens. The leaves are coloured using G17 / G28.
Shimmer paint has been swiped very lightly over the flower, with sections then highlighted with Glaze pens and glitter. I also added a couple of extra leaves around the edge.
Below is the same rose put together with the different layers as normal. I've inked around the edges and added some glitter.
Congratulations to all the winners of the Scrappy-Go-Lucky Blog Hop.
Till next time,
Luv, Tereesa.
Subscribe to:
Posts (Atom)