Hi Friends, Mandy celebrated her birthday last week, so today I thought I'd show you the card I made for her; which was recently featured at Scrappy-Go-Lucky. I’ve really enjoyed exploring the different posssibilities with the Imagine and decided that I wanted to use flowers from the Mother’s Day Bouquet cartridge combined with the gorgeous paper patterns from the Imagine cartridges. 90% of this card is made with Core-dinations White cardstock - the colours and patterns were added with the Imagine.
Some of the beautiful flowers from the "Mother's Day Bouquet" cartridge.
I love all the different shapes.
And this gorgeous birdcage is from "Serenade".
A beautiful background doiley.
Clear embossing was used to alter the look of this plain cardstock.
Here is the completed easel card.
For more photos and full instructions, along with some tips for getting the most out of your Imagine, head over to Scrappy-Go-Lucky.
We also had a birthday to celebrate on the weekend - Alyssa turned 11. All she wanted was to eat out at a restaurant, so it was a celebration to be able to get her out and about for a few hours. Check back tomorrow for some photos of her special day.
Take care,
Luv, Tereesa.
Showing posts with label Easter. Show all posts
Showing posts with label Easter. Show all posts
Monday, March 14, 2011
Saturday, November 6, 2010
Happy Birthday Tracey !!
Hi, Tracey is celebrating her special day today, so I would like to wish her the Happiest of Birthdays! Tracey deserves everything wonderful that life has to offer, and I hope she has a fantastic day.
This is the card I made for her. I chose this digi stamp from Whoopsi Daisy as I think she looks like the birthday girl. She reminds me of Cinderella going to the ball.
I've used the Cuttlebug Roses folder for the background, and an SU punch for the border.
One of the reasons I love the Copics, is that you can colour anything to match. Apart from the blue paper, everything on this card started as white, and was coloured to match the main image.
The happy birthday (cut at 1.2") is from Create A Critter, and the scalloped oval is from Easter 2010. It was actually a circle doiley, and I resized it into an oval using the Gypsy. The white is cut at 1.6" x 3.2", and the blue at 1.75" x 3.5" after using Hide Contour Feature for the holes.
Happy Birthday Tracey!
I'm submitting this card into the following challenges:
Crafty Creations
Passionately Artistic
Whoopsi Daisy
Creative Inspirations
Ellephantastic Challenges
Till next time,
Luv, Tereesa.
Themes
Birthday,
Copics,
Create A Critter,
Easter,
Whoopsi Daisy Stamps
Friday, April 2, 2010
Pop-Up Bunny Card
Hi, To celebrate Easter, I thought I would share with you a couple of cute Easter cards I designed for Scrappy Go Lucky using the Easter 2010 cartridge. We are all excited about the release of the new Cri-Kits gel pens, and I had so much fun using them on these cards. The first is a cute little bunny pop-up card.

The Cri-Kits are so easy to use - simply remove the blade housing from the Cricut machine and replace with the Cri-Kits pen holder.
The background Easter Eggs are drawn using the glitter Cri-Kits (unfortunately the photos don't really show the glitter). Positioning of the eggs was layed out using the Gypsy.

Isn't this a gorgeous bunny....

When you pull the tab on top of the card - the bunny pops up and secret messages are revealed inside.

And......

The Cri-Kits are so easy to use - simply remove the blade housing from the Cricut machine and replace with the Cri-Kits pen holder.
The background Easter Eggs are drawn using the glitter Cri-Kits (unfortunately the photos don't really show the glitter). Positioning of the eggs was layed out using the Gypsy.

Isn't this a gorgeous bunny....

When you pull the tab on top of the card - the bunny pops up and secret messages are revealed inside.

And......
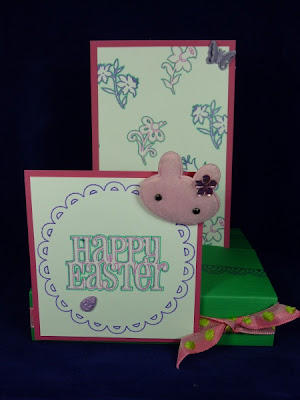
Easter Flowers Card
Here is another Easter card that stands up on its own. I have used only the Glitter Cri-Kits with this card. Everything is drawn - there is no cutting.

I used the same idea for the background, but added the shadow feature in a different colour to outline each image.


The card then folds flat for posting.

Full detailed instructions are on the Scrappy Go Lucky blog.
Happy Easter! Enjoy your long weekend.
Luv, Tereesa.

I used the same idea for the background, but added the shadow feature in a different colour to outline each image.


The card then folds flat for posting.

Full detailed instructions are on the Scrappy Go Lucky blog.
Happy Easter! Enjoy your long weekend.
Luv, Tereesa.
Subscribe to:
Posts (Atom)


