Hi, I hope everyone has had a great weekend. With Spring in the air (apart from all this rain), and because a few friends of mine have just embarked on a road trip, I thought I'd show you another card made for Scrappy-Go-Lucky using Summer Vacation. You should head over to their blog. There is a prize of AU$100 up for grabs to be spent in the SGL store. It's easy to enter, but you'll have to be quick - the comp. closes in 24 hours - 12 midnight Monday Perth time.
For this card I chose a modern Winnebago - then added a touch of sixties flower power. The van is cut at 2 3/4".
For the background, using the Cri-Kits gel pens, a subtle background of maps, signs, and arrows is drawn in gold glitter.
To add definition to the van and words, Cricut Ink Markers were used to draw the images first. Then, without unloading the mat, hit "Load Paper" again, replace the marker with the blade-housing, "Repeat Last", then cut. The same technique can be used with the Cri-Kits Gel Pens for a more subtle outline.
I used some scrunched up stripey paper for curtains .....
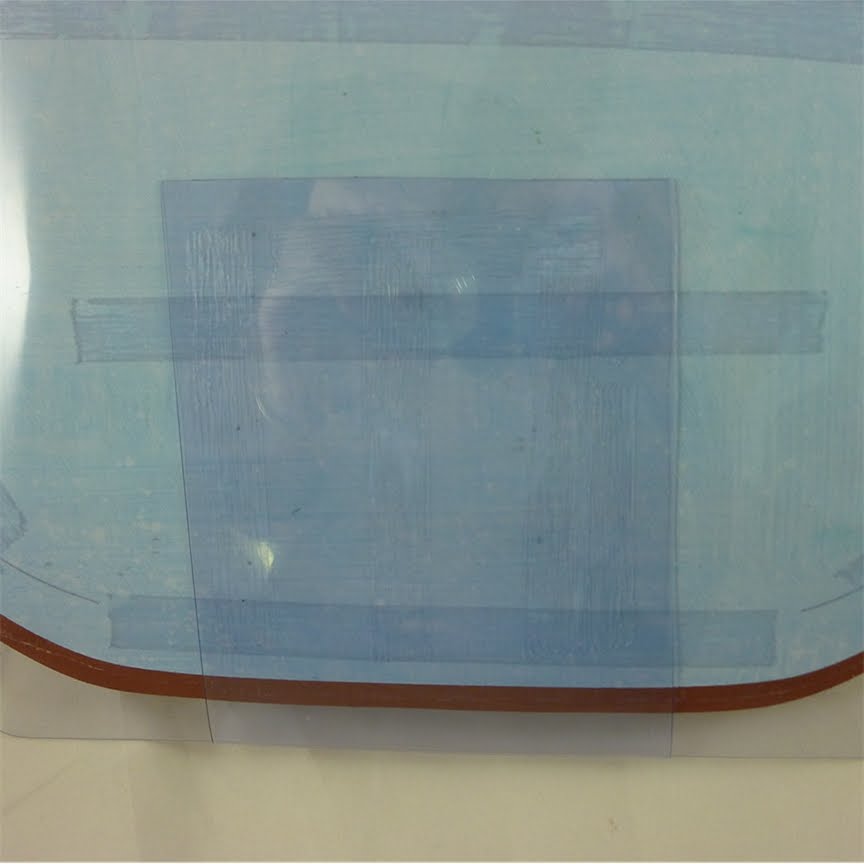
and old x-rays make perfect tinted windows.
I inked around the edge to give some definition and shadow, and drew in lines for door frames, etc. I then added some ink and glaze on the tyres - and of course some glitter.
This cute little bike is from "Everyday Paper Dolls" (page 57). It is cut at 1" and adhered to the background..
The van is then attached using foam dots.
Enjoy....
Luv, Tereesa.
Showing posts with label Cri-Kits Gel Pens. Show all posts
Monday, October 11, 2010
Saturday, October 2, 2010
Retirement Card
Hi, Today I'd like to share with you a card designed for Scrappy-Go-Lucky."Summer Vacation" was released a few months ago, but as we're coming into the warmer weather, I thought it'd be good to go back and have a look. As many retirees now travel the world, the different images come together to make a nice retirement card.
Unless you have Design Studio with the Hide Contour Feature, and as there is no shadow feature on this cartridge, it is impossible to cut the suitcase without the straps and corner cuts. I really wanted this as a feature on the card, so I cut it out of the paper as below. (It is cut at 2").
I then lined up the area on the mat, and using the Cri-Kits gel pens, drew the message on the dark blue layer of the card. The retirement message is 1" and has been put together using the lovely "Gypsy Font". (Pack your bags is 1 1/4", and is from "Summer Vacation"). Both fit in the same size suitcase.
I inked around the edges, added a little more detail, some brads, and put it together...
These modes of transport were all cut between 1/2" and 1", and all have a touch of silver on them.
They are adhered to vanilla cardstock with a little inking.
The bus and ship are on separate pieces of card and attached using foam dots for dimension.
A few more brads with some ribbon to finish. Hope you like it.
Great news - Scrappy-Go-Lucky are now offering free shipping in Australia, and have some great specials on their Cricut Expression machines - so make sure you check it out.
Luv, Tereesa.
Friday, August 27, 2010
Happy Birthday Christopher !!
Well today's the day - my young man is turning 14. He loves the colour green, and is always practicing on his guitar, so I combined the two and came up with the following:-
The card is then finished off with some star brads for my "SuperStar of the Day".
Happy Birthday Chris!
Till next time,
Luv, Tereesa.
The Hannah Montana cartridge doesn't only have to be for the girls. I love the fonts - and one looks like sheet music. I've used this sized at 1/2". I tried cutting it out, but the lines were so fine they kept breaking - so I drew the image with the Cri-Kits Gel Pens and then coloured the letters to make them bold. The background is stamped with a Kaiser stamp to add a subtle effect.
The guitar is cut at 1 1/2", embossed with the Rellie Rave Cuttlebug folder, then glossy accents added. The shadow is cut in black, and the layers in brushed silver paper.
To give them an authentic look, I've used needle and thread for the guitar strings.
The card is then finished off with some star brads for my "SuperStar of the Day".
Happy Birthday Chris!
Till next time,
Luv, Tereesa.
Tuesday, August 10, 2010
Card - Welded Gazebo
Hi, As mentioned earlier, I absolutely love this gazebo image on the Freshly Picked cartridge. I wanted to make this card in the gazebo shape so using the Gypsy, I sized a gazebo shadow cut at 5 1/2". I used the shadow feature to do this so the front image is highlighted when the card is finished.
I then duplicated, flipped, and welded the two images at the three widest points.
Using the hide contour feature, I erased the inner cuts for the back piece to create a solid image.
As the welding caused one side of the gazebo to be smaller, I cut a second shadow image for the front of the card (the photo below shows the back of the card where the front layer overlaps).
I then cut the main gazebo image and layers (again at 5 1/2"). I watercoloured on the left edges of the gazebo for shadow (doesn't really show in the photo), and highlighted the vines with glaze pens. There are flower cuts as one of the layer features, but I have used some pretty forget-me-knots (with a touch of glitter) for extra colour and dimension.
Using Sure-Cuts-A-Lot, and this pretty floral font, I lined up the words "FOR YOU" to show through the columns. It is always best to practise first on scrap paper before drawing or cutting on your final creation.
Lastly I added a champagne coloured rhinestone to the top of the roof to finish off.
Till tomorrow,
Luv, Tereesa
Sunday, August 8, 2010
Card - Welcome Gnome
Hi, I just love garden gnomes, so when I saw a few on this cartridge, I just had to do a card with one. I have based his clothing (and expression) on one of my own gnomes.
I wanted to try colouring this little guy with my Copics, so I used the Cri-Kits Gel Pens to draw the image, then used the shadow feature to cut around him. The gnome and shadow are both sized at 3 1/2".
After heat-setting the ink, I coloured his face, hand, legs, and shirt and pants only. I used a Peachy-Keen "Basic Paper Dolls" stamp, but only inked his nose and eyes.
I cut layers for his hat, belt, and boots at 3 1/2" and attached these along with his whiskers. Shiny silver card was used for the belt buckle.
As I used the shadow feature to cut around the image, I sized another shadow at 3.7". This shadow is adhered flat on the card, and the gnome is attached using foam dots. This way - even though the shadow doesn't quite line up, it's not noticable.
The starburst background is cut from Plantin Schoolbook at 3.7", and has been embossed with the Tim Holtz Woodgrain folder.
After adding some interest to the plain white background, I added some ribbon and flowers with rhinestones, and a welcome sentiment as I think gnomes are friendly little fellows.
Hope you like it ...
Luv, Tereesa.
Friday, June 11, 2010
Tropical Paradise
Hi Everyone, and Welcome to Day 5 of our "Round the World With Cri-Kits" Scrappy-Go-Lucky Blog Hop. I hope you are all checking in daily to pick up the clues.
I too, live in Brisbane in sunny Queensland, and my absolutely favourite place to be is on Hamilton Island on the Great Barrier Reef. You can literally walk out your front door and snorkel to see beautiful fish and colourful coral all around you. It is like being in another world - and I wanted to recreate that amazing experience with a 3D Tropical Fish Tank.
The Gypsy was a must for this design - I used 15 layers. The first was to cut the front panel of the tank at 11 1/4", the 12x24 mat was needed for this. Unfortunately I couldn't find an acetate sheet large enough, so I have used an A3 Document Protector. The second step was to draw the star-fish and bubbles with the Cri-Kits gel pens. I then coloured these in with Glaze pens to give a stained-glass effect (you can still see the smiling faces on the star-fish).
The same steps were applied for the back panel, but I only went over the top part of the sea-grass with the glaze pens. The clear plastic is very hard to photograph, and unfortunately it hasn't shown the gel-pens on this piece.
The first layer of the tank is the "water". I used the Cri-Kits gel pens to draw the outline of the coral in "Glitter Orange", and the sea-grasses in "Metallic Dark Green".
The image was then cut.
The same process was used for the "sand" layer and I used Cri-Kits "Pastel Mauve" for the starfish, "Glitter Gold" for the shells, "Metallic Green" for the seaweed, and "Glitter Dark Silver" for the stones.
A close-up to show you the beautiful colouring of the Cri-Kits.
To save constantly reloading the mat, I lined up the images on the Gypsy, worked out the sizing, and cut everything at once.
The sea-grasses and coral were cut smaller than the Cri-Kits drawings to give more dimension. The sea-grasses were embossed using Cuttlebug "D'vine Swirl", and the coral with "Rellie Rave" - and of course, plenty of glitter was added to emulate sparkling sun through the water.
Thought you might like to see a shot of the creatures as they came to life. Different parts of these were embossed with Swiss Dots, Tiny Bubbles, Textile, Perfectly Paisley, and Candy Cane Stipe. The fish are layered on both sides so they can "swim" freely.
I chose random sections of each creature to highlight with glossy accents, then sprinkled each lightly with diamond glitter.
The back section is coming together ...... Each of the creatures have been attached using different sized foam dots to add a multitude of dimensions. I love the sea-horse with his tail around the coral.
To make this stand up, I cut a piece of acetate and folded it (like a fan) till the desired length was reached as shown below.
I then took the remainder and adhered it to the back.
Acetate was again used to keep the top separated. This piece is sized at 10" x 4 3/4", scored at 1 3/8" on each side. I attached the sides to the top of the tank with large silver brads, and cut around the lip of the tank making the piece invisible.
After working out placement, holes were pierced in the "base" of this top piece. Fishing line was affixed to the middle of the fish as I was glueing the layers, which is now threaded through the top piece allowing the fish to "swim".
A couple of close-ups of the cute little critters... (you may need these photos - you'll see why soon!!!)
I adhered some oyster shells over the base piece to hide the folds. You can also notice the Cri-Kits on the "sand" layer adding some extra colour and dimension.
A photo showing the side view...
And one from the top.
Here I have placed it beside a Cricut Cartridge to give an idea of the true size.
My "Tropical Paradise" in its new home.
Now for the fun part. To win these awesome Cri-Kits Gel Pens (a set of 10 - your choice - plus holder if needed), all you need to do is count how many "sea creatures" have been used in this project. As some of the photos haven't shown the ones drawn with the Cri-Kits very well (my bad photography) - it is only the creatures "cut" with the Cricut. To enter, leave your answer with a comment, and Random.org will choose the winner on Friday June 18.
Don't worry - right or wrong - all comments have a chance to win. (Be sure to leave a way for me to contact you if your comment is chosen.) If you're not already a follower, I'd love to have you join, but it is not required to enter.
And don't forget the major prize - Mandy is giving away the four new-release cartridges -
Cindy Lou / Freshly Picked / Mini Monster / Wall Decor & More
Here's how:-
You need to follow this international Blog Hop and collect the clues. Once you have solved the anagram you need to e-mail the answer to Mandy at:
by Friday 18th June when the lucky winner will be drawn at random.....
Here is my clue.....
Don't forget to check in with Enfys tomorrow to check out her amazing design and to collect the next clue.
Good Luck!
Luv, Tereesa.

Subscribe to:
Posts (Atom)