Tuesday, August 10, 2010

Card - Welded Gazebo

Hi, As mentioned earlier, I absolutely love this gazebo image on the Freshly Picked cartridge. I wanted to make this card in the gazebo shape so using the Gypsy, I sized a gazebo shadow cut at 5 1/2". I used the shadow feature to do this so the front image is highlighted when the card is finished.


I then duplicated, flipped, and welded the two images at the three widest points.


Using the hide contour feature, I erased the inner cuts for the back piece to create a solid image.


As the welding caused one side of the gazebo to be smaller, I cut a second shadow image for the front of the card (the photo below shows the back of the card where the front layer overlaps).


I then cut the main gazebo image and layers (again at 5 1/2"). I watercoloured on the left edges of the gazebo for shadow (doesn't really show in the photo), and highlighted the vines with glaze pens. There are flower cuts as one of the layer features, but I have used some pretty forget-me-knots (with a touch of glitter) for extra colour and dimension.


Using Sure-Cuts-A-Lot, and this pretty floral font, I lined up the words "FOR YOU" to show through the columns. It is always best to practise first on scrap paper before drawing or cutting on your final creation.


Lastly I added a champagne coloured rhinestone to the top of the roof to finish off.

Till tomorrow,
Luv, Tereesa

Scrappy-Go-Lucky Blog Hop

Hi Everyone, Today is the first day of another fun Blog Hop with Mandy. Head over to Scrappy-Go-Lucky for all the details - then each day one designer will show you their creation. You have a chance to win one of the four new cartridges -

Rock Princess
Winter Frolic
Country Life
Happy Hauntings


Monday - Mandy @ Scrappy-Go-Lucky
Tuesday -Jane @ Scossie Jane
Wednesday - Diane @ Capadia Designs
Thursday - Chloe @ Chloe and her Clip On Koalas
Friday - Tereesa @ Up Late 2 Create
Saturday - Amanda @ White Ruffles
Sunday - Tracey @ Trace-Elementz
Monday - Lisa and Tara - back at SGL as they don't have blogs ...... yet

Here's a sneak peak at mine ....


Till tomorrow,
Luv, Tereesa.

Monday, August 9, 2010

Card - Tulip Box

Hi, Today I thought I'd demonstrate another fun feature on the Freshly Picked cartridge. Each image on this cartridge has a frame with a matching cut along the bottom. I have chosen my favourite flower for this card - pink tulips.


The tulip image has all the layers to make this gorgeous planter box full of tulips. This has been cut at 2", and I have embossed the outer layer with Tim Holtz Woodgrain. I've also added a couple of cute little glittered butterflies to soften the lines of the planter box.


Here is a close-up of the framed border. I've used white with pink background paper behind the tulip box, and pink with white background for the cut border.


I have sized the overall frame at 5", and with the Gypsy, it is duplicated and flipped. After using the hide contour feature on the back section, the two pieces are then welded together before cutting. Below is the card when it's open. I've used a small tulip bouquet stamp for a subtle background on the front of the card, and added a couple to the edge of the pink inside the card. The pink area also makes a great area to write your sentiment.


I've used these cute little tag punches from Stampin' Up with thread wound around the side to finish the card.


Till tomorrow,
Luv, Tereesa.

Sunday, August 8, 2010

Card - Welcome Gnome

Hi, I just love garden gnomes, so when I saw a few on this cartridge, I just had to do a card with one. I have based his clothing (and expression) on one of my own gnomes.


I wanted to try colouring this little guy with my Copics, so I used the Cri-Kits Gel Pens to draw the image, then used the shadow feature to cut around him. The gnome and shadow are both sized at 3 1/2".


After heat-setting the ink, I coloured his face, hand, legs, and shirt and pants only. I used a Peachy-Keen "Basic Paper Dolls" stamp, but only inked his nose and eyes.


I cut layers for his hat, belt, and boots at 3 1/2" and attached these along with his whiskers. Shiny silver card was used for the belt buckle.


As I used the shadow feature to cut around the image, I sized another shadow at 3.7". This shadow is adhered flat on the card, and the gnome is attached using foam dots. This way - even though the shadow doesn't quite line up, it's not noticable.


The starburst background is cut from Plantin Schoolbook at 3.7", and has been embossed with the Tim Holtz Woodgrain folder.


After adding some interest to the plain white background, I added some ribbon and flowers with rhinestones, and a welcome sentiment as I think gnomes are friendly little fellows.

Hope you like it ...
Luv, Tereesa.

Friday, August 6, 2010

Card - Framed Rose Bush

Hi, There are so many beautiful flowers and herbs featured on the "Freshly Picked" cartridge, I decided to do another framed card - this time with a Rose Bush.


This card is made exactly the same as the Framed Petunias - the only difference being that it's portrait so the folds are lengthways.


The rose bush, shadow and layers are all cut at 3". I have added swirls to the greenery with Glaze Pens to add a little dimension, and the flower edges have been curled up. A Creative Memories punch was used for the cute little butterflies.


A friend makes up these useful kits (shown below) which make excellent background and dimension patterns. I have used one of them to create the effect on the rose bag.


Another great feature on this cartridge is the cute little seed sachets. This took about 2 minutes to put together, and there is a seed packet to match every image on the cartridge - flowers, herbs, vegetables, fruit, and even garden tools and gnomes. I think they're quite cute.


Till next time,
Luv, Tereesa.

PS: If you are interested in purchasing one of the dimension kits ($6.50), contact me here and I'll pass on her details.

Wednesday, August 4, 2010

Card - Framed Petunias

Hi, I know I'm a little late, but as promised, this week I'm going to show you some of my recent DT projects for Scrappy-Go-Lucky featuring the "Freshly Picked" cartridge. I thought I'd begin with this bright pot of petunias in a self-standing framed card.


Two pieces of card are used cut at 6" x 4". Using George & Basic Shapes, and lining up the placement on the Gypsy, an oval is cut in the centre of the front piece sized at 3.5". Using the Scor-Pal, score two vertical lines - 3/8" and 6/8" - in from each side (as shown on the left below). These lines are then folded, one up and one down (as shown on the right below).


The back piece is also scored and folded with the same measurements.


Again using George & Basic Shapes, I cut an oval at 4 1/4" from a pretty lilac paper, and adhered this to the centre of the back card.


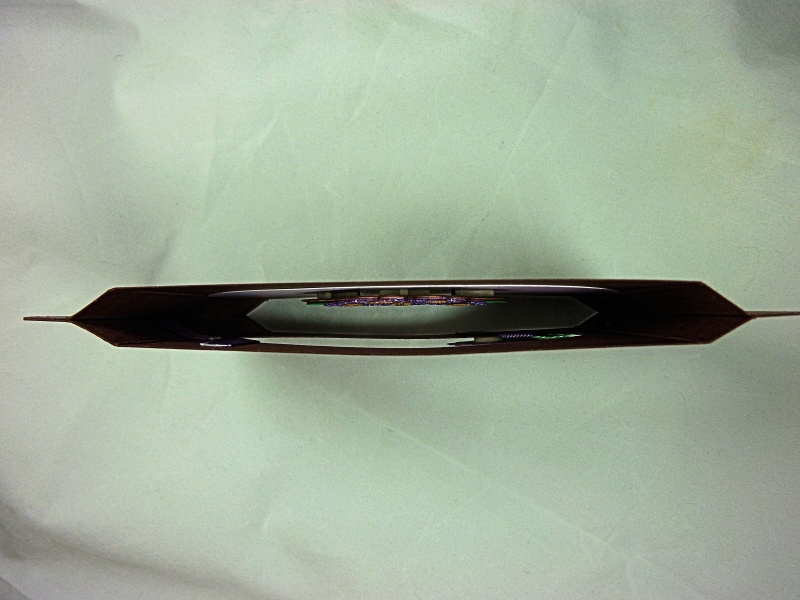
Before the card is put together, I attach all ribbons, etc. so that the ends can be hidden between the two layers. Adhesive is then applied to the two outer folds, and the two card pieces are joined. The photo below shows a view of the card from the top.


This beautiful pot of petunias, layers, and shadow are all cut at 2.1". Cardstock used is DoubleMates, and I have used my Copics to form a shadow on the side of the pot. Of course a little purple and gold glitter is added for sparkle. The pot is attached with foam dots for extra dimension.


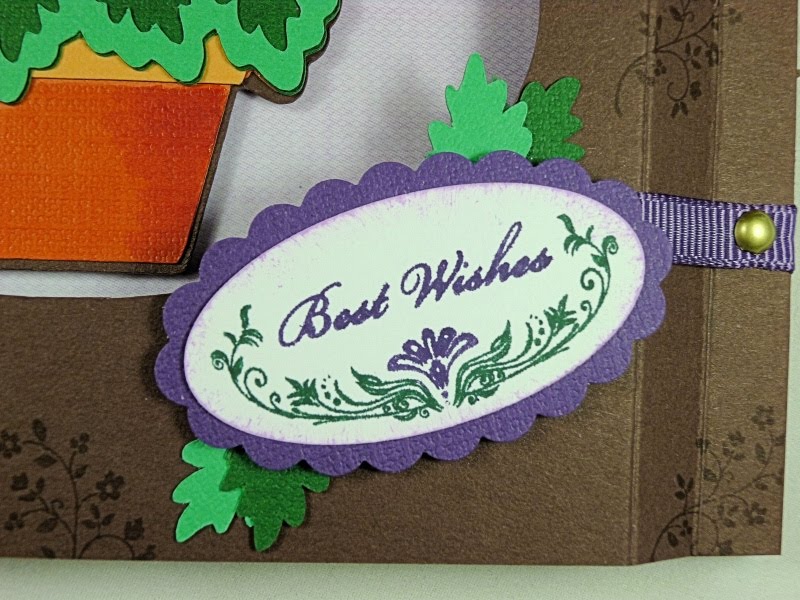
The light green leaf layer left some smaller leaves as extras. As I don't like wasting anything, I have used these to highlight the sentiment. One reason I love the DoubleMates cardstock is that, being double-sided, one cut gives you two different coordinating looks - light and dark. The sentiment is from Stampin' Up; and I've added a couple of brads on the ribbon, and also stamped some small flower stems on the main card front for a subtle background.


Till next time,
Luv, Tereesa.

Sunday, August 1, 2010

First Cricut Class

Hi, The first of our monthly Cricut Classes kicked off today with a Basics Class aimed at those just beginning their Cricut journey. Below is a peak at the cards we made using the George & Basic Shapes, and Storybook cartridges.


These heart cards were fun to make - they are two separate hearts that are joined and spin with a brad.


I thought these two were really cute with a sparkling sky in the background.


Thank you to all the ladies who attended - with your eagerness and laughter, it was a fun afternoon. We are sure you now have the confidence to plan and create some wonderful pieces.


I would like to say a huge thanks to Shelley whose hard work and dedication helped made the afternoon such a success. I look forward to many future classes with my "partner in Cricut (crime)". I must also thank the star-assistant of the day - Alyssa - whose help was invaluable. And a special thanks to Mandy and Scrappy-Go-Lucky who supplied the girls with some discount vouchers for Cricut products. I'm sure they will make good use of them.

Dates will be posted soon for the next class - so stay tuned.

I'll be back tomorrow with some recent DT projects for Scrappy-Go-Lucky using Freshly Picked.

Till then,
Luv, Tereesa.